 You want to begin blogging your book, but your resources are limited. You feel like you can’t get started, since you know the best avenue is to begin with a WordPress.org self-hosted blog. You’re not super techie, though, which means you don’t think you can set up your site by yourself. But you don’t have the money for a developer to help you get the blog up and running, let alone to pay the small yearly hosting fee.
What should you do? You could start with a free WordPress.com hosted site and convert it to a WordPress.org self-hosted site later. What this means is that you can get started now and upgrade later.
Keep in mind that there are reasons why I recommend WordPress.org sites over WordPress.com sites. So, even if you feel you must have a WordPress.com site, make this choice in an educated fashion. Read this blog first.
How to Start Your WordPress.Com Blog
If this is the option you choose, here’s how to get started:
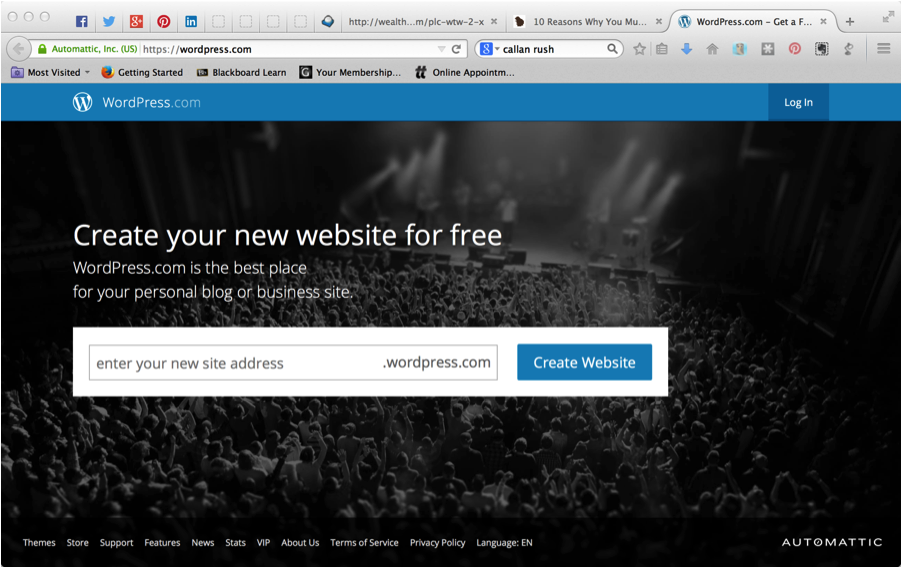
Step #1: Go to WordPress.com and create an account. Be sure you think ahead and decide what you want your blog to be called before you fill in the first screen. Whatever you enter here becomes the URL of your site. So if you type in “My New Blog,” you will get “mynewblog.wordpress.com.”
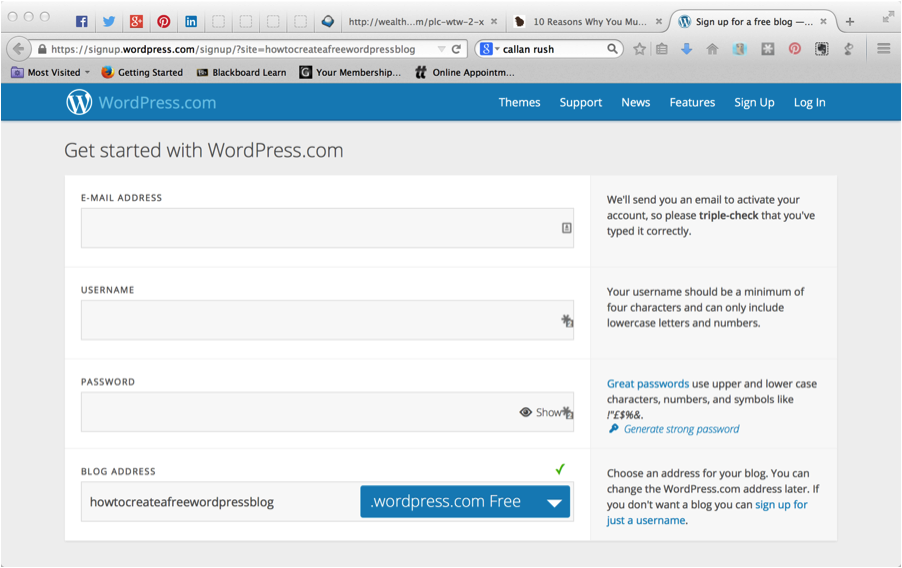
Step #2: Fill out the “Get Started with WordPress screen. This is pretty self-explanatory. You have a second chance to think about your blog name. You’ll see it in the last fill-blank.
Also note that you can choose to spend $18/year and get your own .com URL without the wordpress.com at the end. You can probably purchase one cheaper elsewhere if you were hosting on your own, but this is your only option here.
Be sure to click the correct privacy setting. You can change this later, of course. But if you want the blog viewable so you gain readers, don’t make it private, rather “viewable by everyone.”
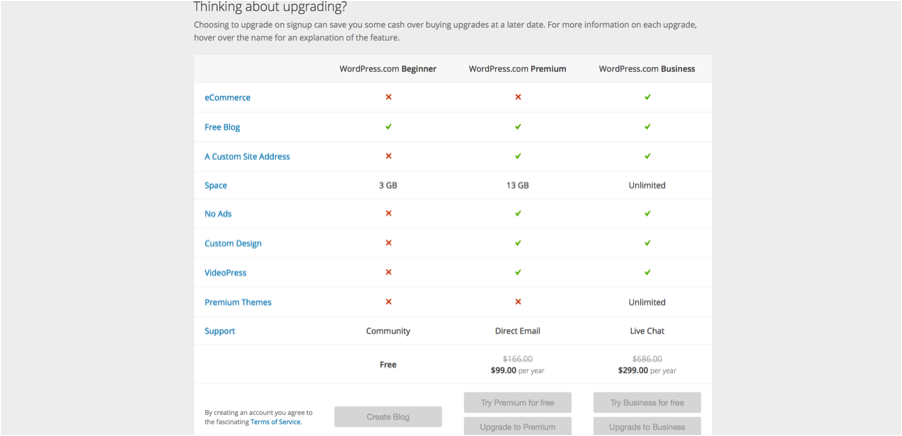
You do have the option to upgrade to Premium at this point. You will see the options, but I suggest you just pick a free account.
Click on Create blog under the first column where it says “free.” Super! You have created your blog!
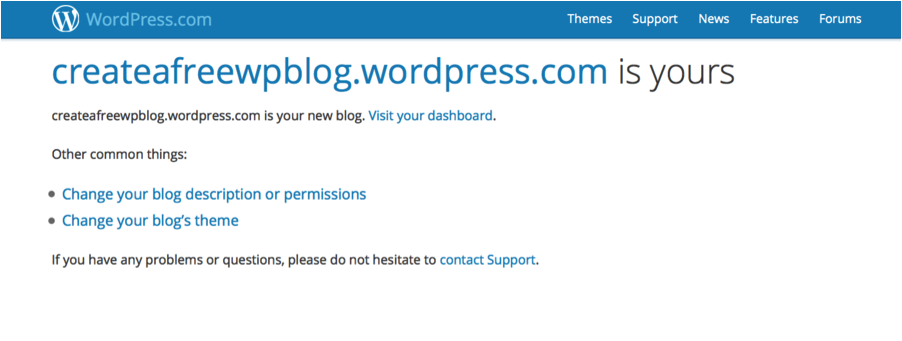
You will now be taken to the next screen. You can opt to go to your dashboard, change blog descriptions or choose a new theme.
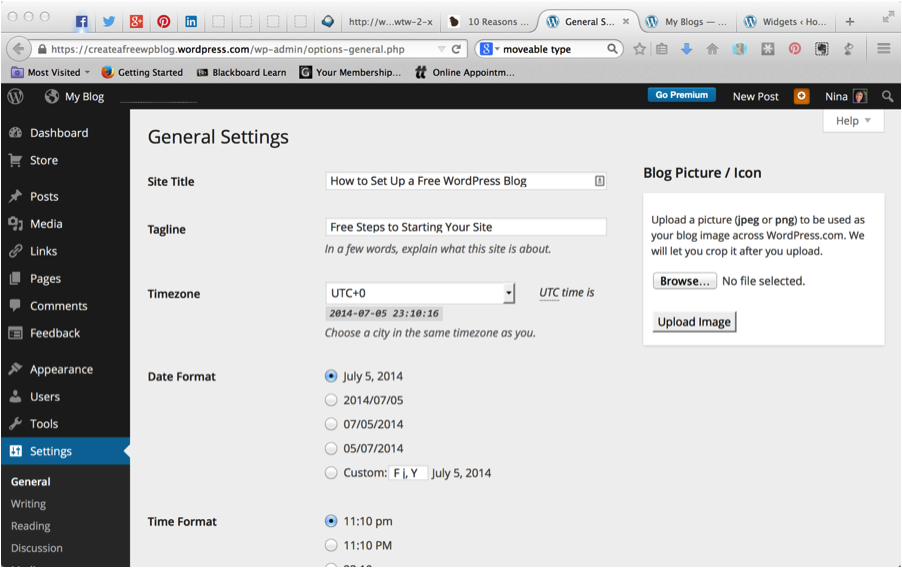
Step #3: Click on “Change your blog descriptions or permissions” first. Spend a few moment on your blog description and the other settings. (You can find these on the left side of the screen when you get to the dashboard.) If you are blogging a book, the “Site Title” works like the title and the “Tagline” like your subtitle of your book.
Step #4: Next, click on “Change your blog’s theme.” Each blog comes with a standard theme. You can spend hours choosing a new theme. Have fun with that! Test a few out, and find one you like.
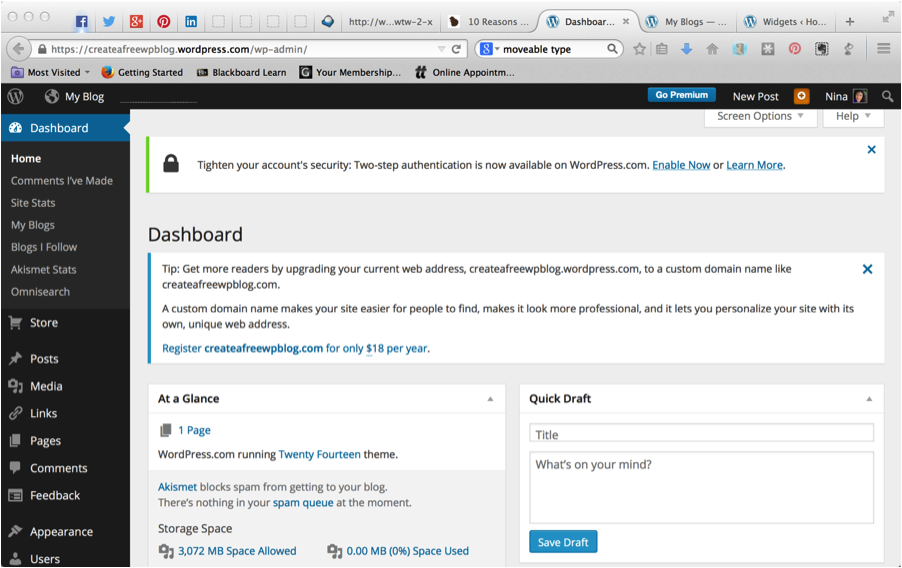
Step #5: Finally, click on the link that says “Visit your dashboard. Welcome to the world of blogging! Now you can up some pages and widgets.
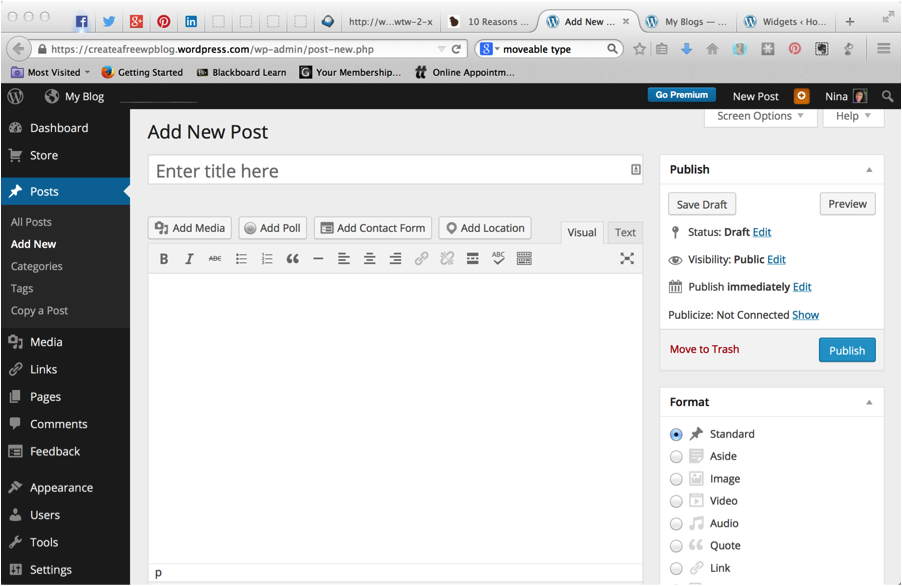
Step #6: At this point, you are ready to start blogging! Click on the item on the left hand of the dashboard that says “Post,” or hover over it, and then click on “Add New.” This will bring up a screen for a new post. You are now ready to input your first blog post title and the content for your new post. You can add media (photos) and polls or contact information as well. When you are finished, hit the “Publish” button on the right side of the post, and you have completed your first post. Congratulations.
Your blog is now up and running. I hope this brief tutorial helps you start your free WordPress.com hosted blog. Please keep in mind that I do recommend a WordPress.org self-hosted blog. But I’d rather see you blog and blog a book on a free blog than none at all.
Now, go blog that book!



Leave a Reply