If you choose to use a membership site to create and deliver a course based on your book, use all the same principles you’ve learned in previous posts, such as with password-protected pages on your blog or with an email autoresponder system. The same concepts apply, and you provide the same types of content, such as videos, audio (from your teleseminars and webinars) and supplemental materials. The difference lies in the actual technology you will use, which allows you to automate payment, mailing list inclusion, delivery, and scheduling. Of course, it also allows you to dictate who gets access to each bit of content on the site. That’s the primary advantage of a membership site, although the other features make using this technology well worth the effort as well.
How to Create Your Book-Based Course
Without going into technical detail, since I’m not techie enough to do so, here are the five basic steps you need to take to create a course from your book using membership site software, which is usually a plugin:
- Typically, you must create a product in the particular program. In Premise, this involves creating access levels, too. The program asks you to create a Thank You page (for after someone orders) and to input information on pricing and the email list to which to add new “users.” This guarantees that when someone pays, they are registered, added to the appropriate list, and given the correct access levels to see their content for the course. You must also link to PayPal or some other payment method.
- Create landing pages for each module or session. These should include your video(s), audio and ancillary material (PDFs, ebooks, reports, etc.). If you haven’t created your content previously, you will need to do that by following the steps in my previous posts. You can add a header (art or logo) to each page and make that header link back to your home page or to any other page you like, such as the table of contents for the course. To provide easy navigation, each one of the course pages also can allow users to log in or out of the site or link back to the table of contents page.

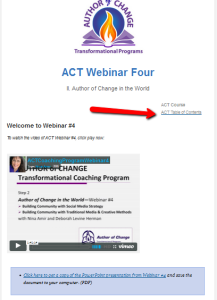
Simple course page created in Premise with a webinar (video) recording and a PDF of the presentation as well as a table of contents link for navigation. A log out link was provided at the bottom of the page as well. (Click to enlarge.) - Make each landing page accessibly only to users of that particular course, as well as to the correct level of the course (if you have basic and advanced or premier users, for instance). This usually is done with a simple click; if you’ve created the product(s), you’ll have a choice to make the pages accessible to those who purchased the products.
- Create a table of contents page. This should include the links to each of the modules or sessions. It also can feature any bonus material, directions, schedules, welcome messages, etc. If you want the modules “dripped out” on a schedule, such as one per week or per month, this is done here with html coding.
- Create a sales page. This is the page to which you direct prospective customers once you are ready to launch your program. Write compelling sales copy. Possibly record a video or some audio and place it on this page explaining why your target audience should purchase the course. Include the benefits of the course, and, of course, the payment buttons. If possible, get testimonials from beta users.

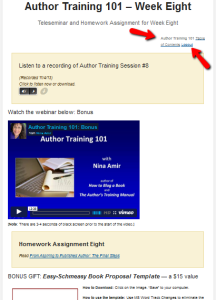
This is a more detailed course page created in Premise. It has a log out option and a link to the table of contents plus a variety of content on the page. The page also features a banner at the top with the course logo. (Click to enlarge.)
If you use a program like Premise, you will find that your content and landing pages turn out looking quite professional. The program offers some advice on how to write and design your sales pages.
As I mentioned previously, I have had to get help with the more technical aspects, such as anything that needed html coding—log in and log out links on pages, links back to the table of contents on content pages, and the table of contents itself (especially if the content was dripped out and if I had a variety of user levels, such as basic and premium). Contact me if you need recommendations on Premise experts to help you.
Sell Your Course
Once you have set up our course on your blog site, you can begin selling it. There are many models for online selling, and many opinions on what works best. In the end, you’ll need to determine what works best in your market, for your audience and with your products.
Some people do a large “launch.” This can involve affiliate partners, free teleseminars and webinars, give-aways, reduced fees, or any number of other promotions. Some marketers like to sell their products continually, especially if they are a home-study course, which means they are always available for sale. Others like to “open” and “close”—or do a periodic re-launch. Some offer the course as a home-study version and then occasionally do it “live.” Many provide a special deal at certain times of the year, such as on Cyber Monday.
You’ll hear some experts professing to only sell one course option, such as one price or one version of your course. Others will say to provide three—a low priced version, a mid-priced version and a high-priced version.
Try a few different things and see what works best. Every market is different. I know that too many options are confusing to people. When faced with too many choices, most people simply don’t choose at all.
The main thing is to get a course based on your book up and for sale. If you’ve been following this series, at this point you have many ways to do just that.

Leave a Reply